Taking screenshots is an east task: simply press “Print Screen” (or PRT SC) in your keyboard and you have a ready-to-use screenshot in your clipboard. MacOS users can use Command + Shift + 3 to take a screenshot of the entire screen. However, if you want to take a screenshot of a specific area of the screen, the process might be a bit different than usual. This tutorial will show you how to take a screenshot of a specific area of the screen on both Windows and MacOS.
Built-in Screenshot Tools
Windows and MacOS built-in screenshot tools are ready to use and allow users to capture a screenshot of an area of the screen. They help take screenshots of error messages, images, or anything else that needs to be shared or saved.
Windows
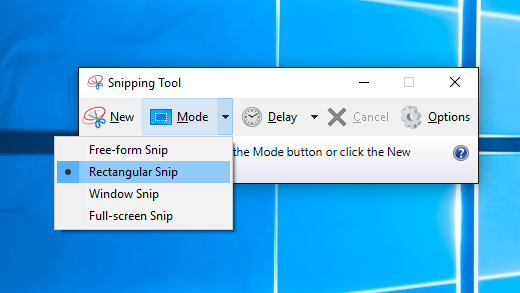
Windows operating system comes with a built-in screenshot tool called Snipping Tool . It allows users to capture a screenshot of an area of the screen and save it as an image file.

To use Snipping Tool, follow these steps:
- Open the Snipping Tool by typing “Snipping Tool” in the search bar and clicking on the app from the results.
- Click on “New” to start a new snip.
- Select the type of snip you want: Free-form Snip, Rectangular Snip, Window Snip, or Full-screen Snip.
- Click and drag the cursor to select the area of the screen you want to capture.
- Release the mouse to take the screenshot.
- Edit or annotate the screenshot if desired.
- Save the screenshot as an image file.
MacOS
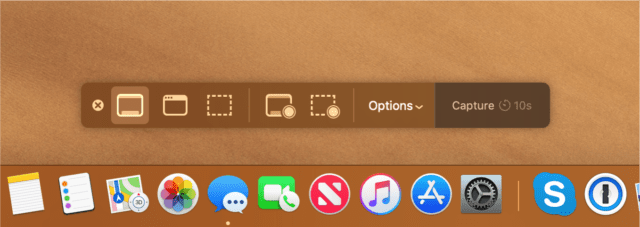
MacOS also has a built-in screenshot tool that allows users to capture screenshots of an area of the screen.

To use the screenshot tool on a Mac, follow these steps:
- Press
Command+Shift+5to open the screenshot tool. - Select the type of screenshot you want to take: Capture Entire Screen, Capture Selected Window, or Capture Selected Portion.
- If you choose Capture Selected Portion, drag the cursor to select the area of the screen you want to capture.
- Click on the “Capture” button to take the screenshot.
- Edit or annotate the screenshot if desired.
- Save the screenshot as an image file.
Third-Party Screenshot Tools
Overall, various third-party screenshot tools are available for both Windows and MacOS users that can capture a specific area of the screen and provide additional editing and sharing options. These tools are easy to use and offer a variety of features, including adding annotations, shapes, and text to the captured image, features which might not exist in the built-in screenshot tools.
Windows
For Windows users, several third-party screenshot tools can capture a specific area of the screen. One popular tool is Snagit , a paid software, which allows users to capture screenshots, record videos, and create GIFs. Snagit also offers editing tools, including adding text, arrows, and shapes to the captured image.
Another option is Greenshot , a free and open-source screenshot tool that enables users to capture a specific area of the screen, a window, or the entire screen. Greenshot also allows users to add annotations to the captured image and save it in various formats, including PNG, JPG, and BMP.
MacOS
MacOS users can use the built-in screenshot tool to capture a specific screen area by pressing Command + Shift + 4. However, there are also third-party tools available for more advanced screenshot options. One such tool is Skitch , which allows users to capture a specific screen area and add annotations, shapes, and text to the image. Skitch also offers integration with Evernote, allowing users to save and share their screenshots easily.
Another option for MacOS users is Lightshot , a free and easy-to-use screenshot tool that allows users to capture a specific screen area, add annotations, and share the image with others.


