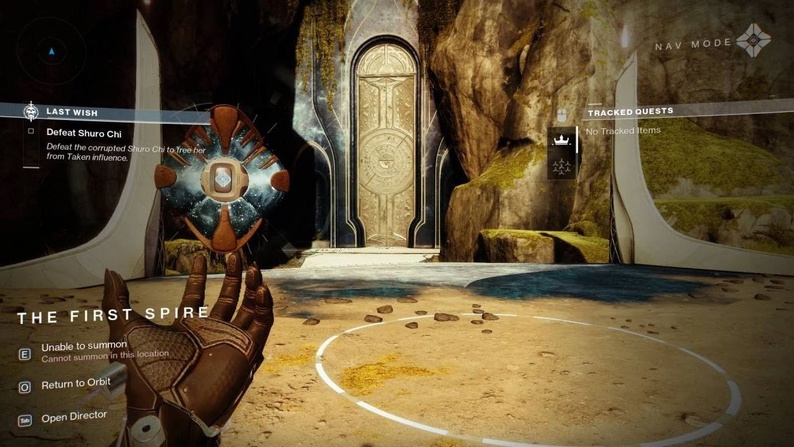
Destiny 2, the popular online multiplayer first-person shooter from Bungie, offers players numerous missions, raids and 3 to 6-person activities filled with intense battles and breathtaking landscapes. While journeying through these adventures, knowing how to get checkpoints to save your place is essential. That way, you can use those checkpoints later to level up weapons, finish bounties from all the vendors, and more.
What are Checkpoints and how do they work?
In Destiny 2, checkpoints are points in a raid, dungeon, or mission that serve as progress markers. When you reach a checkpoint, your progress is saved, allowing you and your fireteam to leave the game and return later without losing your progress.
Checkpoints are particularly valuable during difficult raids, or in places where certain action can be farmed, or when the activity you performed is part of the weekly rotator and, as such, might provide the benefit of repeatedly dropping good rewards like exotics or powerful gear.

Checkpoints are automatically granted as you progress through specific parts of a raid or mission. These points are usually tied to significant encounters or boss fights, although it isn’t always the case (like Golgoroth’s Cellar, more on this below). Once you’ve reached a checkpoint, it remains active until the weekly reset that happens every Tuesday, at which point all raid checkpoints are reset, and you’ll need to start from the beginning.
Remember that checkpoints are character-specific, so if you switch characters, your checkpoint will not transfer.
Why would I want to save a checkpoint?
Most commonly, to avoid having to start from the beginning of a raid or mission. Checkpoints are also useful for farming specific activities. You want to farm specific activities if you’re looking for specific loot you haven’t acquired yet. A couple of examples of this are:
- The hand cannon, Eyasluna, can drop from the boss encounter of the Grasp of Avarice dungeon. Having a checkpoint at the boss encounter will allow you to farm for this weapon by repeatedly completing the encounter multiple times. Each time you complete it, there’s a chance for the weapon to drop.
- Certain exotics such as the “Touch of Malice” or “Collective Obligation” can drop from finishing the raid they belong to. Having a checkpoint at the final encounter of the raid will allow you to farm for these weapons instead of having to do the entire raid from beginning to end.
We recommend you to look for the loot table for the specific raid or mission you want to farm, then focus on getting a checkpoint for it.
In some cases, exotics can only be farmed when the raid or dungeon are part of the weekly rotator (as in, a specific week of the season might have the raid or dungeon you want as “featured”; if that’s the case, you can farm that specific activity for the exotic you want).
How do I “save” or “share” a checkpoint?
There are two ways to save a checkpoint, although one is present in almost 90% of the content:
- By being at the encounter you want to save, then have the entire fireteam wipe after the encounter is started. This process will save the checkpoint, but it will only work if all the conditions are met:
- The people that want to keep the checkpoint are with you.
- You start the encounter.
- You wipe after the encounter has started. It doesn’t matter how you wipe, but often jumping off the map edges is the easiest way.
- Some encounters do not have a way to “start the encounter”, since there’s no encounter to start, and as such, just by “being there” at the place will give you the checkpoint.
- An example of this behavior is in the Golgoroth’s Cellar encounter from the King’s Fall raid: it’s a labyrinth which can be handled to get an additional secret chest but to save the checkpoint, you simply have to “be there”.
Getting a checkpoint is half the process. The other half is to ensure you keep the checkpoint even after completing the activity. To do this, you will need a designated “checkpoint holder” in your fireteam. This person will switch to a different character (the one they don’t want to use while farming) and perform the steps mentioned above. That “character” will now be able to keep the checkpoint.
What you need to do now is as follows, assuming you’re at the checkpoint you want to save:
- Have the checkpoint holder switch to the character they don’t want to use while farming and be at the checkpoint you want to save. For example, imagine the holder has all 3 classes, and they want to use their Titan to save the checkpoint, but they want to farm the encounter with their Hunter.
- Once the checkpoint holder is in the character they don’t want to use, the Titan, have the rest of the fireteam join on them.
- Start the encounter, then wipe shortly after. This will give everyone in the fireteam the checkpoint.
- After seeing the summary screen for that given encounter and be brought back to the beginning of it, have the checkpoint holder switch back to the character they want to use while farming, the Hunter.
- Make sure they don’t switch to the alternate character they don’t want to use while farming. For the example here, they should be using their Hunter to farm, and the Titan to save the checkpoint. The checkpoint must be completed in their Hunter.
- Have the checkpoint holder, now in the Hunter, join the rest of the team, which should still be at the checkpoint at the beginning of the encounter.
- Complete the encounter, get the loot, then have the checkpoint holder leave the fireteam and switch back to the character holding the checkpoint, the Titan.
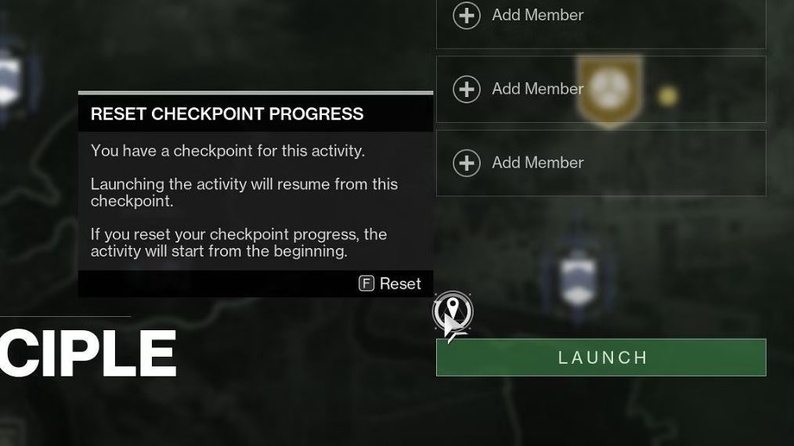
- Have the checkpoint holder in their Titan load into the mission. You’ll see that while launching it, there will be a marker right above the “Launch” button, indicating a checkpoint is available. Load the mission.
- Once the checkpoint holder is in, using their Titan, have the rest of the team join on them.
- As a pro tip, whoever has the lead for the rest of the fireteam can bring the entire team with them, so they don’t have to join one by one.
- When the entire team is in, and the checkpoint holder can see them with their Titan, have the checkpoint holder switch back to the character they want to use while farming, the Hunter.
- Have the checkpoint holder in their Hunter join the rest of the team, which should still be at the checkpoint, the beginning of the encounter, then rinse and repeat from step 5.
The following image is an example of what the icon for the checkpoint look like when acquired in a character for a specific mission:

The same icon can be used to delete the checkpoint from your character. Be careful when using it.
Acquiring Checkpoints in Destiny 2
There are several ways to get a checkpoint for your favorite activity in Destiny 2.
Reaching Checkpoints organically
The most straightforward way to obtain checkpoints is to play through the raid or mission with your fireteam. As you complete each encounter, you’ll automatically receive a checkpoint. To save this checkpoint to your character, follow the steps above.
Discord Servers & Subreddit Groups
If you’re primarily interested in specific encounters or skipping ahead in a raid, you can acquire checkpoints from other players. Follow the steps mentioned above to grab the checkpoint from this player. Many Destiny 2 communities, such as Discord servers and subreddit groups, facilitate checkpoint sharing among players.
The best place to get these checkpoints is by asking in:
- The Destiny 2 LFG Discord server . There are several channels dedicated to different content, as well as a social club channel where you can ask for checkpoints.
- Popular streamer’s Discord servers. Many streamers have their own Discord servers where they share checkpoints with their viewers, like:
- Aztecross
- Misleading
- Luckstruck9
- Own a Discord server? Contact us to appear here!
In terms of Subreddit groups, we would recommend joining these and using either the help tag or joining their Discord servers:
/r/DestinyTheGamesubreddit & their Discord server/r/Destiny2subreddit & their Discord server/r/RaidSecretssubreddit & their Discord server
We strongly encourage you not to post in the Subreddit groups directly asking for checkpoints unless you genuinely have a need for it that matches the intention of the Subreddit. This, because those Subreddits are not meant for “checkpoint sharing” but more or less to discuss about the game overall. Use their Discord servers instead.
Websites with Checkpoint Bots
The last option is to acquire checkpoints from bots. Bots are automated accounts created by friendly players that have been given a specific checkpoint. The easiest place to get a checkpoint from a bot is the website www.d2checkpoint.com . In there, you’ll see several accounts that you can join, then use the steps mentioned above to grab the checkpoint from the bot.
“Last Wish” specific checkpoints
The other odd option, and it’s specific only to the “Last Wish” raid is to use the Last Wish’s “Wish Wall” to enter a code and get a checkpoint. This is a very specific use case, and it only works for the “Last Wish” raid.
This page on Steam will shows you all the possible wishes you can enter in the wall and what they do. Not all of the wishes are a “checkpoint”, in fact, some of them have a cosmetic effect. This Youtube video will show you step-by-step how to get to the wish wall and how to enter a given code, if you need a more visual explanation.
Using join codes
To share checkpoints, you’ll need your “join code”. A join code is nothing more than your Bungie ID in the format of Username#1234 where Username is your in-game name, and #1234 is a randomized number that Bungie assigned to you. You can find your “join code” in game in the Team & Clan Roster tab or in the Bungie website.
Joining a player via their join code is quite simple, all you need to do is type the following command in the in-game chat (not to confuse it with your PC’s Steam chat or your Console’s social chat):
/join Username#1234
Where Username#1234 is the join code of the player you want to join. You can also join a player by adding them as a friend first, then clicking on their name in the Roster’s friend list, however this method requires more actions and, as such, people will often not use it.
For consoles like the Xbox or PlayStation, entering this text might depend on whether you have a keyboard connected to your console. You can also use your console’s companion app as an external keyboard or use an on-screen keyboard with a cursor that you can use to type. Check your console’s website for more details.


